Welcome to the Hello Kitty Hop! It's the day after Thanksgiving and Hello Kitty is out shopping to give all her good friends presents whether it be cat nip <hehe> or something super special. Hop along with us while Hello Kitty is getting herself ready for the holiday season whether it be decorating the tree, wrapping presents, or just looking dog gone kitty cute! If you came from CallyAnn then you are in the right place but if you happened upon my blog then you need to start at the beginning at Lynne's blog, Her Craftiness. Here's the list of links sew you don't get lost along the way -- just follow the tinsel as we decorate the town with Hello Kitty!
Blog candy is being offer by Her Craftiness and I also am offer blog candy. I will cut 10 white kitties and 10 Santa suits. I would love for you to follow my blog and Face book page. Please leave me a way to contact you by email.
I didn't think that I could join in on this blog hop, because I didn't have a Hello Kitty digi or Cricut cart. However, I have have been a die hard Sizzix fan for years. When I went to my dies, I happened to find a kitty that just happens to look like Hello Kitty. I was ecstatic! Especially after I found the outfit I was going to put on her.
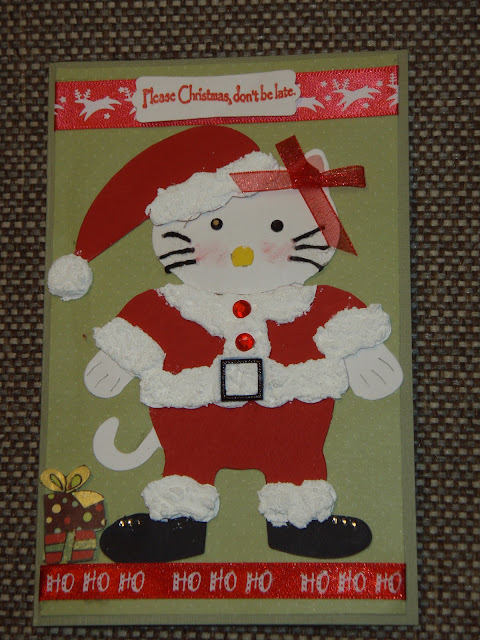 |
| The card is made out of a green card stock. I used a green with white polka dots on top of it. It came out some Christmas paper stash that I had in the closet. For Hello Kitty, I first cut out the body in white card stock. I then cut the Santa outfit out of red and some black for the boots. The Santa suit was only the coat and boots, so I had to use the pants from the sheriff's costume. The snow that is on the trim is done with Jumbo Snow-Tex. It takes a little time to dry, but is a great look. At first I was going to just draw on the whiskers, but then chose to use embroidery thread. The eyes, buttons, belt, and boots are just bling out of my bling box. Of course she needed some pink cheeks, done with chalk and a red bow. I used Christmas ribbon that I had on hand, reindeer for the top and Ho Ho Ho for the bottom. I stamped the sentiment with a Rosie's Road Show stamp and embossed with clear emboss. I just love her stamps. Then I punched it with a Stampin' Up punch. The presents are cut from a piece of Christmas paper, made by Cloud 9. |
Of course I decided the inside needed to be decorated too. So, I added the same polka dot paper to the inside, along with the same ribbons. The holiday greetings stamp is from Stampin' Up. I stamped it and then embossed it with clear emboss. I then punched it out with an EK Success punch. The I'll take one in every color stamp is a Rosie's Road Show stamp. It is also stamped and clear embossed, then punched with a Stampin' Up punch. It is sitting on top of a piece of red glitter paper, which was punched out of red glitter paper. The presents are all individually cut from the Cloud 9 paper, same as the front. Each present is popped up. I added green, blue, and red little ribbons.
 |
| The kitty die is a Sizzix Bigz Die |
 |
| The Sherrif die is a Sizzix Bigz Die |
 |
| The Santa die is a Sizzix Bigz Die |
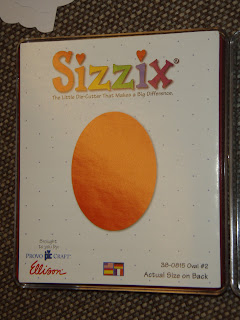 |
| The Oval #2 die is a Sizzix Original Die |
 |
| The Oval #1 die is a Sizzix Original Die |
 |
| This is Cloud 9 Christmas paper, which I used to cut out all of the presents. |
All of the punches that I used.
Stampin' Up punches
EK Success punch
Thanks for stopping by my blog and have fun hopping! :) don't forget the bloggy love at each stop along the way and have a wonderful time!
I am the last blog. I hope you had a good Hello Kitty time.
Merry Christmas,











 I Love TheHIVE















OMG! This is just fabulous. Love the idea. New follower.
ReplyDeleteHugs,
Patty
creativediva98.blogspot.com
creativediva98 at gmail dot com
Very cute christmas card! TFS CallyAnn(follow and FB)
ReplyDeleteKitty looks very festive... ty for explaining and showing tools... its a great help to us beginners :) lindaplusthree at yahoo dot com
ReplyDeleteYour kitty in his Santa suite is perfect! You made a great card or should I say cards. : ) Jearise in Lorby's World.
ReplyDeleteCute card. I love the snow texture. Nice being in the hop with you.
ReplyDeleteAshley
glamoroussideofscrapping at gmail dot com
http://theglamoroussideofscrapping.blogspot.com
Wow a big kitty love her xxx nicky xx
ReplyDeletegreat ideas!
ReplyDeleteJanet Royer
http://janetscreativeworld.blogspot.com
Your card is adorable. Thanks so much for sharing.
ReplyDeletehttp://racincrafts.blogspot.com/ or
racincrafts at aim dot com
Bummer..at the end of the HK blog hop. Everyone did an awesome job. I think it is So cool that you had these sizzix dies on hand and are so creative to make a HK Santa. She is so adorable. TFS
ReplyDeleteTTFN from a new follower. dpookybear at yahoo dot com
So many great projects! Thanks for sharing!
ReplyDeletemy-o-scrappin.blogspot.com
smmyiow@gmail.com
Great way to make it work for you. I love your projects. Great job! TFS!
ReplyDeleteChristel
http://onescrappinsista.blogspot.com
lol...this is cute! you did a great job and creative way to use your tools! :) it was great being in the hop with you! :)
ReplyDeleteKari
great card and all the details....cool
ReplyDeleteWOW I love Miss kitty in Santa suit.millierose651@aol.com
ReplyDeleteYour Faux Hello Kitty is real nice. Thank you for such a nice detailed tutorial of the card process, I am a follower already:)
ReplyDeletemexicopetshop@hotmail dot com
cathyplus5.blogspot.com
What a fantastic card!!!! It is so creative and I love the paper for the presents. So glad to be in this hop with you :)
ReplyDeleteHappy Scrappin'
Sue B
http://susanascorner.blogspot.com/
Love the card!!!! Thanks for sharing.
ReplyDeleteSharon
Momfong@aol.com
Tami, you blew me away with your talent and ingenuity!!!!! This is totally absolutely amazing and I'm am ever sew thrilled you participated in this hop!!!!
ReplyDeleteHugs, Love, and Pixie Dust!
Lynne